
This sad thing waited for me all through the weekend. It's all squared-up with no where to go. About the same time I did this, I got the scrap bag back out and realized I still had enough t-shirt left to create some strips for binding. Initially, I wasn't sure about binding with t-shirts as it is stretchy and may not lend enough support to the thing. In the end I decided why not go all the way.
This means the only materials I bought for this quilt (beyond necessary quilting tools which will be used over and over) are the wadding and some embroidery floss. Everything else was reused from my stash. It's not much, just fabric and thread, but I'm pretty proud of that fact.
Anyway, on to the binding.
I had two white strips left over from the 'back widening' snafu and enough big red blocks and two red sleeves to create two more strips. The white strips were 2.5 inches and the red 2 inches. Having not read a binding tutorial yet, I didn't realize this could be a problem.
In fact, when I started, I didn't plan on reading a tutorial As with the rest of the quilt, I was going to figure it out on my own.
I began 'pinning' the white strips in preparation.

My plan was simply to run a seam down the edge, turn it all over, iron a fold in the remainder of the binding and sew it down. Luckily I thought this through a bit more before putting needle to fabric. Have you spotted the problem?
Simply sewing down the back side would leave an obvious seam on the front. I couldn't for the life of me figure out how to fix that, so I broke down and looked up a tutorial. Of course, I realize refusing to use tutorials is ridiculous as the whole point of the my side of the blog is to learn from those women willing to pass along their skill and memory and learn myself. So I humbly typed 'how to bind a quilt' into Google and stumbled upon this one from Red Pepper Quilts. At first read I didn't understand anything beyond the fact that I had cut my red binding too skinny, I should fold the binding in half first thing, and I really should have a continuous length of binding instead of four separate pieces. Oh well. I started with the one thing I could fix and hoped it would all work out.
 |
| being lazy and folding while still 'pinned' |
 |
| finished product |
 |
| red binding waiting on the banister |
I attached the white binding first with a zigzag stitch right along the edge. In hindsight, leaving a seam allowance would have made it less 'curly.' The jersey of the t-shirts tended to stretch a bit and so it was more like a surged edging than a seam.

Once the white binding was attached, I ironed it flat and 'pinned' the red.

When sewing the binding, I left the corners free. I have yet to figure those out. Again, I have an idea in my head of how it should work, but those ideas haven't worked in reality thus far so I may have to rethink. Having learned from the white edges, I left a bit of a seam allowance with the red. Apparently temporarily forgetting the red wasn't wide enough in the first place.
Things were humming along just fine until about six inches from the end of the last edge.
Suddenly the machine gave out. The thread kept busting, the needle kept hitting the foot and there was a rat's nest of thread to be cut away underneath every time.
I couldn't figure it out. I tried re-threading about six times. Same problem every time. I tried taking the foot off and reattaching. Same thing. I tried tightening all the screws, thinking it got jangled in the move. Same thing. At one point a very large clump of lint came out with the rat's nest of thread. At this point I had made enough frustrated noises that Pete came upstairs to check out the problem. He watched about three attempts and suggested everything I had already done. After witnessing the lint ball he decided to take off the running board and blow out any remaining lint.
The next attempt worked and I finished the last six inches.

It wasn't until that point that I turned the quilt over to inspect the work that I found the real culprit.
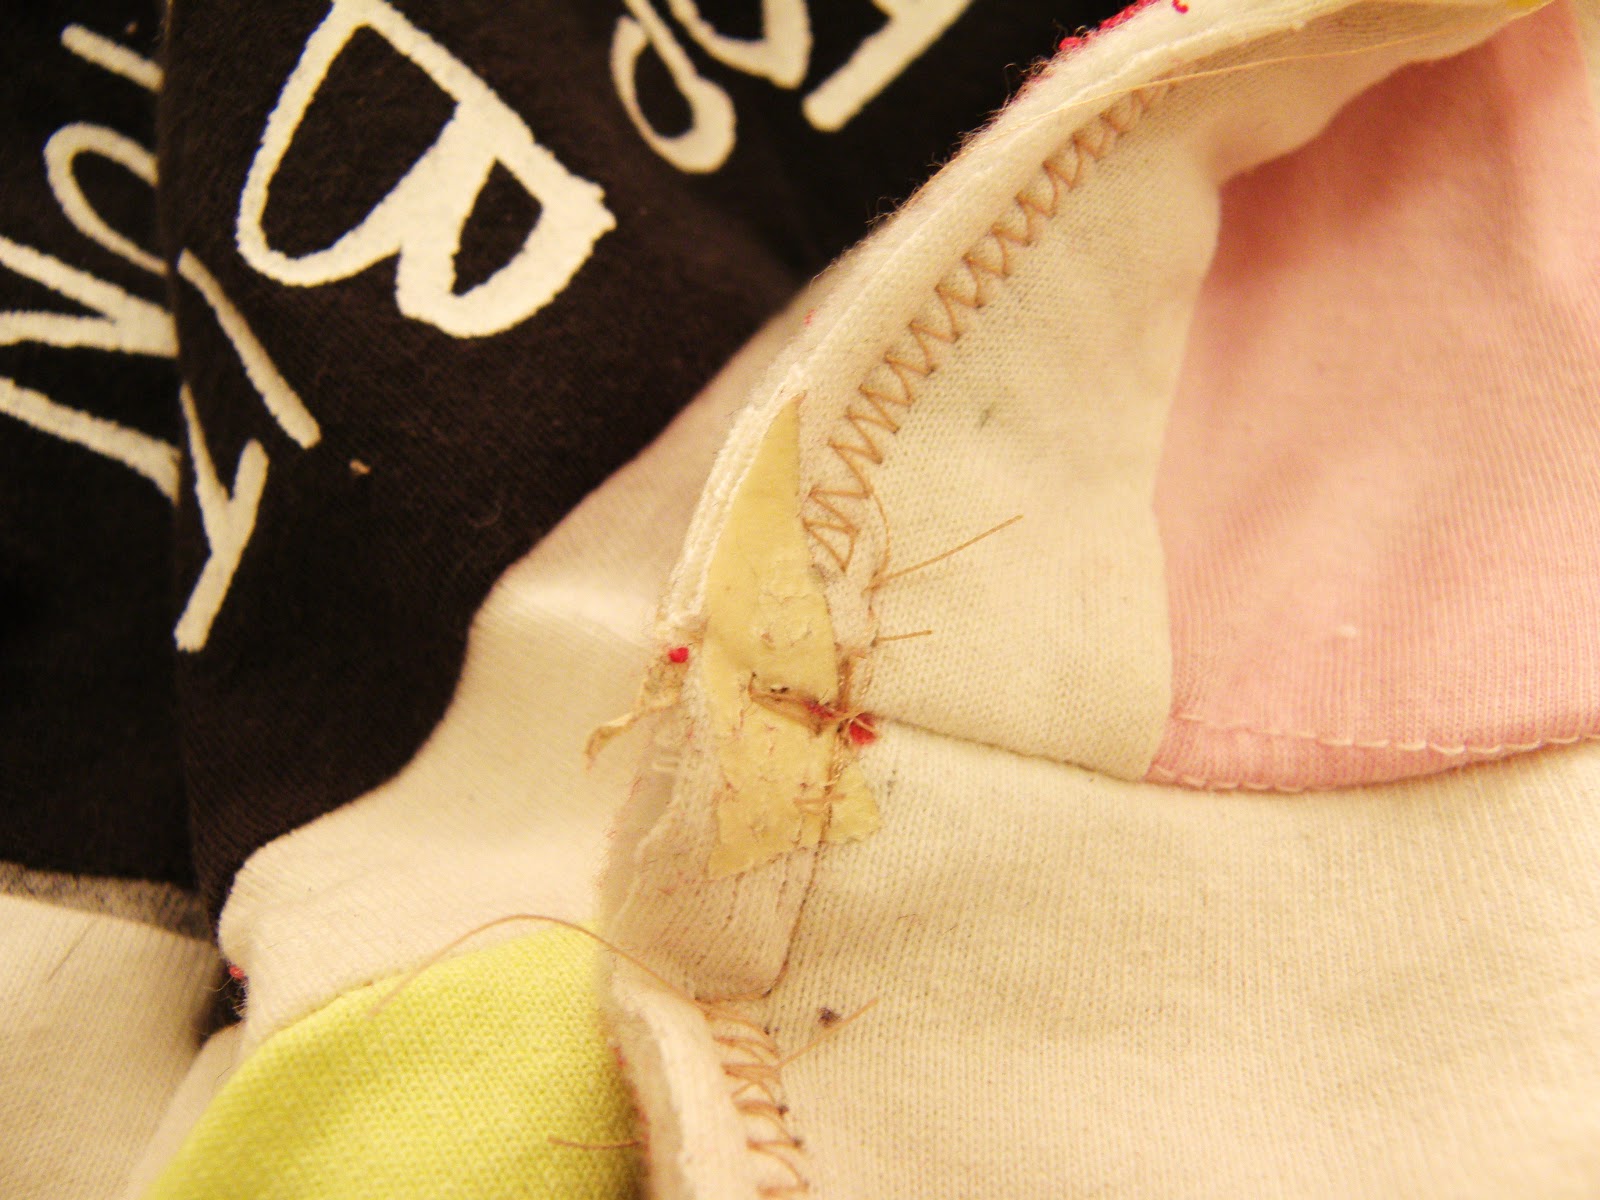
I had left a piece of masking tape on the backing. Oops!
At the time I probably thought it was a relic of the process and left it to be a marker for a story. The resulting story of lint and frustration was not expected.
No comments:
Post a Comment